Version 1.4, August 2022
Written by: Eero Tamminen
See also: Hatari manual
Hatari on the WWW: https://www.hatari-emu.org/
Hatari UI is an out-of-process user interface for the Hatari emulator and its built-in debugger which can (optionally) embed the Hatari emulator window. Having the UI in another process allows doing it with a higher level language and avoiding adding GUI toolkit dependencies to Hatari itself.
The UI is done with PyGtk i.e. in Python language, using the Gtk widget set. it is an additional UI, the built-in Hatari SDL UI is not being replaced or going anywhere!
While the built-in SDL UI for Hatari has its good points, it has also many minor shortcomings:
As you can see from the screenshots, the features offered by the new UI are nice also on desktops, but the configurability is especially important for devices that have constrained input methods; limited set of keys and e.g. high DPI touchscreen. Something like this UI is really a must on devices with no right or middlebutton, where use of stylus or finger makes double clicks hard because the pixels are so small that hitting the same place twice is not easy and which lacks standard Atari keys.
One of the targets for the UI configurability and features was Nokia N8x0 (Linux) devices with 226 DPI 800x480 touchscreen and limited number of keys. This reflects slightly in the UI design too. For example text pasting is done in separate dialog instead of in an inline control and one can easily add buttons for synthetizing specific key presses.
See screenshots for more details.
There are several other features that would be nice in the new UI:
There are some issues which cannot be handled in an external UI (without additional support from Hatari):
Hatari is available from major Linux distributions and Hatari UI is included with it. The latest version can be found from the Hatari Git repository: https://framagit.org/hatari/hatari/-/tree/main/python-ui
Besides Linux, the UI could eventually be used even on Windows by first installing the PyGtk dependencies listed on (otherwise unrelated) Gramps application Windows dependencies page. Additionally the Hatari control socket code needs to be ported to Windows (i.e. use WinSock or have proper Cygwin build of Hatari with unix domain socket support).
Mac should not be a problem, under its UI glitz it is mostly BSD unix.
Current Hatari UI uses standard Gtk menu and toolbars instead of the button boxes used in older versions. You can still configure the buttons included to the top / bottom / left / right of the Hatari screen though.
Hatari UI with the About dialog open:
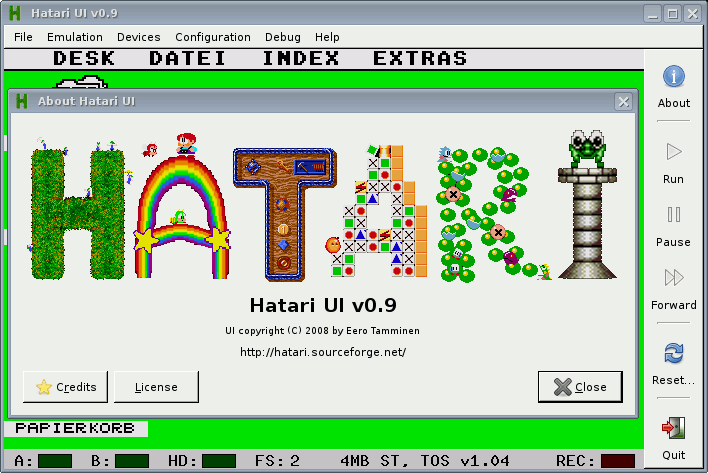
Options:
hatari-ui.py --embed --right "about,|,run,pause,forward,|,reset,|,quit"
While the older UI is bit different, these option examples and their screenshots show how to specify elements and their layout for the Hatari Python UI.
Hatari UI with the About dialog open:
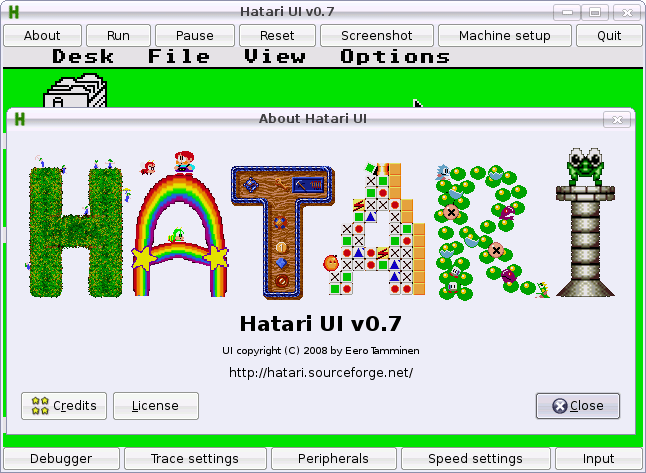
Options:
hatari-ui.py --embed
--top "about,run,pause,reset,screenshot,setup,quit"
--panel "Input,..."
--panel "Speed settings,..."
--bottom "debug,trace,peripherals,Speed settings,Input"
An example UI configuration without the embedding option:
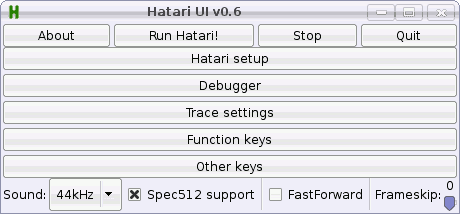
Options:
hatari-ui.py
--top "about,run,pause,quit"
--panel "Function keys,..."
--panel "Other keys,..."
--right "setup,debug,trace,Function keys,Other keys"
--bottom "sound,spec512,|,fastforward,|,frameskip"
A panel with controls for configuring performance:
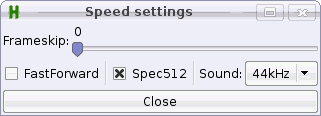
Options:
--panel "Speed settings,frameskip,>,fastforward,|,spec512,|,sound,>,close"
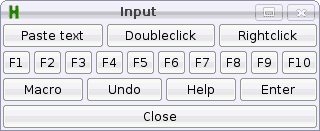
Another panel, with buttons for keys and mouse button events:
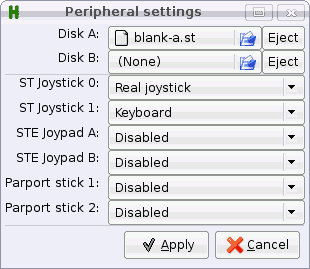
Peripherals settings dialog:
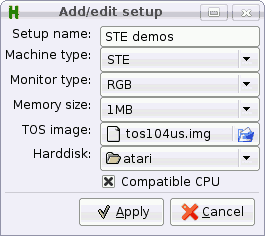
Machine settings dialog:
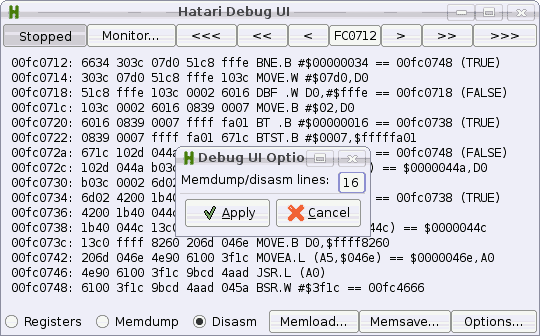
Debug UI:
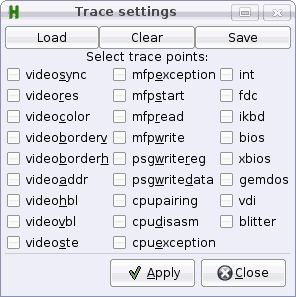
Trace settings dialog:
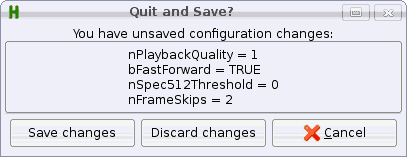
Quitting with unsaved options:
Hatari UI v1.4
==============

Usage: hatariui.py [options] [directory|disk image|Atari program]

Options:
	-h, --help		this help
	-n, --nomenu		omit menus
	-e, --embed		embed Hatari window in middle of controls (X11 only)
	-f, --fullscreen	start in fullscreen
	-l, --left <controls>	toolbar at left
	-r, --right <controls>	toolbar at right
	-t, --top <controls>	toolbar at top
	-b, --bottom <controls>	toolbar at bottom
	-p, --panel <name>,<controls>
				separate window with given name and controls

Available (panel/toolbar) controls:
	|		Separator between controls
	>		Start next toolbar row in panel windows
	changes		Latest Hatari changes
	pause		Pause Hatari to save battery
	bugs		Hatari bugs
	path		Device & save file paths
	recanim		Record animation
	sound		Sound settings
	forward		Whether to fast forward Hatari (needs fast machine)
	joystick	Joystick settings
	uireadme	Hatari UI README
	todo		Hatari TODO
	trace		Hatari tracing setup
	input		Simulate text input and mouse clicks
	hatariui	Hatari UI home page
	full		Toggle whether Hatari is fullscreen
	harddisk	Hard disk images and directories
	uirelease	Hatari UI release notes
	authors		Hatari authors
	shot		Grab a screenshot
	lconfig		Load configuration
	release		Hatari release notes
	floppy		Floppy images
	hatari		Hatari home page
	recsound	Record YM/Wav
	mails		Hatari mailing lists
	debug		Activate Hatari debugger
	reset		Warm or cold reset Hatari
	display		Display settings
	machine		Hatari st/e/tt/falcon configuration
	sconfig		Save configuration
	device		Toggle Midi, Printer, RS232 peripherals
	load		Load emulation snapshot
	save		Save emulation snapshot
	about		Hatari UI information
	quit		Quit Hatari UI
	manual		Hatari manual
	run		(Re-)run Hatari
	compatibility	Hatari compatibility list
	<panel name>	Button for the specified panel window
	<name>=<string/code>
			Synthetize string or single key <code>

You can have as many panels as you wish.  For each panel you need to add
a control with the name of the panel (see "MyPanel" below).

For example:
	hatariui.py --embed \
	--top "about,run,pause,quit" \
	--panel "MyPanel,Macro=Test,Undo=97,Help=98,>,F1=59,F2=60,F3=61,F4=62,>,close" \
	--right "MyPanel,debug,trace,machine" \
	--bottom "sound,|,forward,|,full,|,quit"

if no options are given, the UI uses basic controls.
To configure the keys, you need Atari keycode map matching your TOS language / version. Thorsten Otto has documented them here: http://tho-otto.de/keyboards/